Umbrella dryer cost against a bagging machine and bags over five years at one entrance, using live prices and BOM rain days you can swap for your own.
Floor Slip Testing: What Happens in an On-Site Test
Floor slip testing is a technician measuring how much grip an installed floor has when it’s wet, using a portable pendulum on site. Building and facility managers usually ask about it after a fall, when an insurer wants a current figure, or when a new cleaning contractor or a coating has changed how the floor feels underfoot.
For most single sites the visit takes one to three hours. The floor is wetted one small patch at a time, the instrument is swung across each patch, and the report gives a number for every location tested. This guide covers what happens during the visit, where the readings should be taken, how to get the floor ready, and what the report can and can’t tell you.
The standard behind floor slip testing on an existing floor
Two Australian standards deal with slip resistance, and they split the work by the age of the surface. AS 4586 classifies new materials, which is where the P and R ratings on a tile spec sheet come from. Our guide to what P3, P4 and R10 mean covers those. A floor in service is measured under AS 4663-2013, a 33 page standard with a wet method and a dry method for existing pedestrian surfaces. Standards Australia currently lists it as pending revision, so ask whoever does the test which edition they’re working to when you book.
The line between new and existing is drawn earlier than most people expect. NATA, the national accreditation body for testing, says in its accreditation criteria for slip testing that a surface becomes existing once it’s installed and open to foot traffic. From then on an accredited tester has to test it in place under AS 4663. Cleaning, pressure washing or machine scrubbing doesn’t reset that. Only something that physically changes the surface does, such as a coating, etching, sandblasting or grooving, and after one of those the floor is treated as a new surface again for testing.
What the technician does on site
The instrument is the same pendulum used to rate new tiles: a weighted arm with a rubber slider that skids across a wet patch of floor and records how much of its swing the floor took away. A wet pendulum test on site runs in this order.
- Test locations are agreed with you before the visit. Each different surface and each risk area is tested separately.
- The pendulum is levelled on the floor and zeroed, and the length of floor the slider touches is set.
- A slider is fitted. Slider 96 is the rubber for floors people cross in shoes, and Slider 55 is for barefoot areas such as pool surrounds. The rubber is conditioned before it’s used.
- The patch is flooded with water and the arm is released.
- Five readings are taken in each direction, in at least two directions, and averaged. The second direction is there because some finishes, brushed concrete for one, have a texture that runs one way.
Most single site visits take one to three hours, and a twenty location job such as a shopping centre takes about half a day. Testing can be booked before or after trading hours, which is worth doing for a front entrance.
There’s a second method in the standard, the dry floor friction test. A motorised tester drags a rubber slider across the dry floor and reports a coefficient of friction. It describes the floor dry and nothing else. For an entrance that takes rain, the wet pendulum is the one to ask for.
Where the readings should be taken
NATA requires accredited testers to have a written method for choosing test locations in the field. The method has to take into account what the test is for, the type and volume of traffic, the surface finish and variations in workmanship, and it has to deal with sampling bias. So the tester shouldn’t take a list of spots from you without question, and you can fairly ask why each of theirs is on the list.
For a commercial entrance, these are the locations we’d want read.
| Location | Why it’s worth a reading |
|---|---|
| Just inside the doors, on the main walking line | Heaviest traffic, and the first hard floor that rain and wet shoes reach |
| Where the matting ends | Shoes are still damp and this is the first step onto the smooth floor |
| Lift lobby or reception desk | Further in, lighter wear, and usually assumed to be dry |
| Any step, landing or ramp inside the entrance | The building code sets ratings for these, and the ABCB advisory note counts an entry lobby as a surface that gets wet |
| A strip against a wall that nobody walks on | Same floor and same cleaning with almost no foot wear, so it shows how much traffic has changed the surface |
| Each different finish | Honed stone beside polished stone is two floors as far as the pendulum is concerned |
One thing the readings won’t show is how far the water travels. The test wets every patch it measures, so the result at the lift lobby is the grip that floor would have if it were wet. Whether it does get wet on a rainy morning depends on the matting and on what happens to umbrellas at the door. If you have an umbrella dryer or umbrella stands inside the entrance, walk the lobby on the next wet day and note where the wet footprints stop. Put that distance next to the report and you’ll know which of the tested locations people are really crossing wet.
How to get the floor ready
Mostly, leave it alone. The test is meant to measure the floor people walk on every day, so it should be in its normal state: cleaned the usual way, with the usual product, on the usual schedule. A special scrub the night before gives you a number for a floor nobody normally walks on.
Cleaning is often the thing being tested without anyone saying so. SafeWork NSW’s page on slips, trips and falls lists slippery floors resulting from cleaning products and methods among the common indoor sources of risk, and its floor table notes that terrazzo can be slippery when too much polish is used. If you suspect residue, say so before the visit. One option is to have a location read as found, then cleaned and rinsed properly and read again. The gap between the two numbers is the cleaning.
What does help is paperwork and access.
- Say why you’re testing. NATA expects an accredited report to state the purpose, whether that’s periodic monitoring, a safety audit, a defect investigation or a contract requirement, and the purpose affects where readings are taken.
- Write down what the floor was last cleaned with and when, and whether a sealer or polish has gone on since it was laid.
- Find the original product test report if there is one, so the tester knows what the surface was sold as.
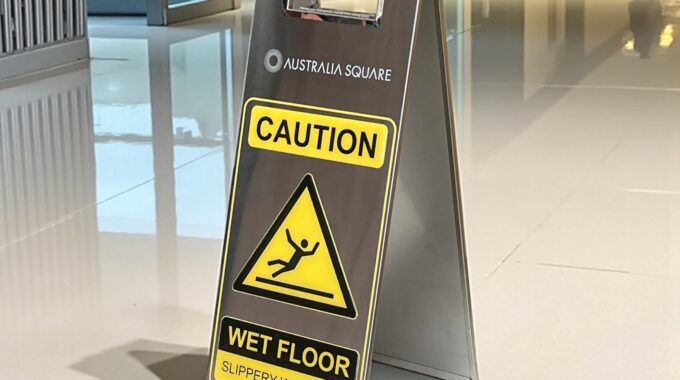
- Pick a quiet time and tell security and the cleaners. Each tested patch is flooded, so keep a wet floor sign beside it until it’s been dried off.
What the report contains
A slip test report should give you:
- the standard and method used, and which slider
- the purpose of the testing
- each location, described well enough that someone else could find it again, usually with photographs
- the mean reading at each location, written as BPN (British Pendulum Number) or SRV (slip resistance value)
- what accreditation, if any, the report is issued under
Behind those numbers, NATA’s criteria require pendulums used for AS 4663 work to be calibrated to the European standard EN 16165, and it treats the rubber sliders as consumables that can’t be used past their expiry date unless they’re shown to still meet specification.
There are two things the report can’t do. NATA’s criteria say a result from an existing floor can’t be used to state the likely or equivalent classification of the product under AS 4586. The reason given is that slip resistance can change a lot during installation or once traffic starts, so a figure measured on site years later doesn’t show whether the tile met its rating when it was supplied. Some reports still show which P band a reading falls in. Read that as a description of the floor today. It isn’t evidence about the product you were sold.
The other limit is interpretation. The readings are measurements. An opinion on whether the floor is safe enough for your building is professional judgement, and NATA points out that opinions of that kind in a test report sit outside its testing accreditation. If your insurer wants that opinion, ask for it in the brief and ask who will be giving it.
When to test again
None of the sources we read for this article sets a fixed interval, and whoever tests the floor can recommend one for your traffic. These are the usual triggers.
- After an anti-slip treatment. A coating or etch makes the floor a new surface for testing, so the first test afterwards can classify it. Then book a follow-up, because a treatment can pass on day one and lose grip as it wears or reacts with cleaning chemicals. SafeWork NSW’s hazard checklist asks whether any anti-slip paint, coating or tape has worn smooth or been damaged.
- After a change of cleaning contractor, chemical or machine. A different pad or product can polish a floor that used to pass.
- After a slip or fall, before anything about the floor or the cleaning is changed.
- Before a lease starts or the building changes hands, so there’s a dated baseline.
Keep every report. One reading says little. The same locations read again at each retest show whether the floor is losing grip and how quickly.
Booking a test and what to ask
We haven’t quoted prices because they depend on travel and on the number of locations. When you ask for a quote, give the brief in full: the address, the areas, a rough count of locations and the reason for testing. Ask how long the report takes, which slider will be used, how the locations will be chosen and what accreditation the report is issued under.
The last question matters most when the report is going to someone else. The ABCB advisory note says facilities accredited by NATA are the ones recognised under the building code, so if a certifier or insurer has asked for the test, check with them what they’ll accept before you book.
Frequently asked questions
How is slip resistance measured on an existing floor?
With a wet pendulum test done in place under AS 4663-2013. A weighted arm with a rubber slider is swung across a wetted patch of floor and the loss of swing is read off a scale. Five readings are taken in each direction and averaged for each location.
How long does floor slip testing take?
Most single site visits take one to three hours, and about half a day for twenty locations. It can be booked before or after trading hours so the entrance isn’t being tested while people are arriving.
What is in a slip resistance testing report?
The standard and slider used, the purpose of the test, each location with a description and photographs, and the mean reading at each one. A report on an existing floor describes the floor as it is on the day. It can’t be used to state what the product was classified as when new.
Where can I find slip resistance testing near me?
Slipless tests floors on site, so tell us where the building is and we’ll confirm whether we can get to you. Testers often travel between cities, so the nearest office isn’t always the only choice.
Where Slipless fits
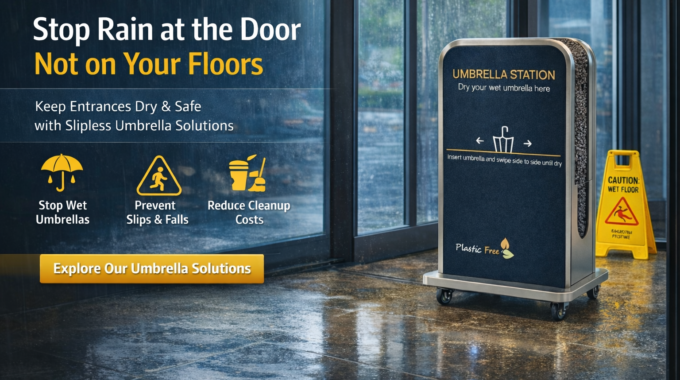
We test floors on site, and where a floor needs more grip we apply an anti-slip coating and test it again. We don’t sell flooring or matting. A slip test tells you how the floor grips when it’s wet. The equipment we supply affects how much of the floor gets wet: wet umbrella dryers, umbrella bagging machines, umbrella stands and bins, and stainless steel wet floor signs. If a report comes back with low readings past the mats, our wet weather entrance plan sets out what to run on a rainy day, and the comparison of stands, bins, bagging machines and dryers covers which equipment suits which building.
Contact us to book a floor slip test, or send your entrance layout and we’ll suggest what to put at the door.
Related Posts